6 Methods to Fix the “JPG File Not Opening” Error
Experiencing the “JPG File Not Opening” error can be very annoying. But you’re not alone. We’ve all experienced that sinking feeling when our cherished JPG files refuse to open. But rest easy, because the good news is there are different solutions that can come in handy in such a situation.
In this comprehensive guide, we will discuss the possible causes of JPG files not opening and show you the best techniques to get rid of the error efficiently without requiring advanced knowledge. Let’s dive into the article without wasting much of your time.
Part 1. Can’t Open JPG File? Check These Reasons
Here are some of the top reasons why you might be experiencing the JPG file not opening error;
- Virus or Malware attack
- Outdated Photos app
- System File errors
- Corrupted System Files
- Corrupted JPG file
- Windows image viewer is broken.
Part 2. Fix the “JPG File Not Opening” Error with 6 Methods
To help you get rid of the “JPG file not opening” error, we’ve explained 6 different techniques you can use to get the job done without any hassle. Read on to find out more about these techniques and how they work.
Method 1. Rename the JPG file
Our first recommended technique to fix the JPG files won’t open error is by renaming the JPG file. Yes, this is because the extension of the JPG file you’re trying to open with the Photos app might be wrong. So, it’s advisable to rename the file and change the extension from JPG to JPEG.
See the steps for this method below;
Step 1: Locate the JPG file in the location where you saved it. Then, right-click the file and select Rename from the menu list.
Step 2: Now, rename the JPG file without adding the JPG extension to it and click save to finish.
If the above method did not work, don’t panic. You can try the next method.
Method 2. Update to the Latest Photo Viewer or Photo App
If you’re trying to use an outdated version of the Photo Viewer or Photo App to open the JPG file, there’s a high chance you experience the JPG file not opening error. This is because there might be glitches and bugs preventing the app from opening the JPG file. You should try updating the app to its latest version to fix the error.
Step 1: Click the Windows Start button on your PC’s keyboard and select Settings.
Step 2: Select Windows Update from the bottom left side and click Check For Updates.
Step 3: A list of Updates available to be made will be displayed on your screen. Then, locate the update for Photos App and click Install Update.
Your Photos App should be updated after you complete the above steps. Restart your computer and try opening the JPG file to see if it works this time.
Method 3. Repair Corrupted JPG files with Photo Repair Tool
If none of the above methods worked for you, the problem might be from the JPG file you’re trying to open. Perhaps, it has been corrupted with viruses. So, it’s advisable you employ the help of an advanced photo repair tool like Wondershare Repairit Photo Repair to fix the JPG file.
Repairit Photo Repair provides you with advanced features to fix any kind of damage in photos. It does not matter whether the photo is blurry, has dark spots, is corrupted with viruses, or is not opening. This tool will help you get rid of the problem within a few minutes. Besides, it supports advanced repair mode, allowing you to repair badly damaged photos quickly and easily.

Key Features
- Repair damaged photos with all levels of corruption, such as grainy photos, dark photos, pixelated photos, faded photos, etc.
- Repair images of diverse formats, such as JPG, JPEG, PNG, CR3, CR2, NEF, NRW, etc.
- Repair critically damaged or corrupted photos available on SD cards, phones, cameras, USB flash drives, and more.
- Support Windows 11/10/8.1/8/7/Vista/XP and macOS 10.10 ~ macOS 13.
Step 1: Install the Wondershare Software on your PC and start the program.
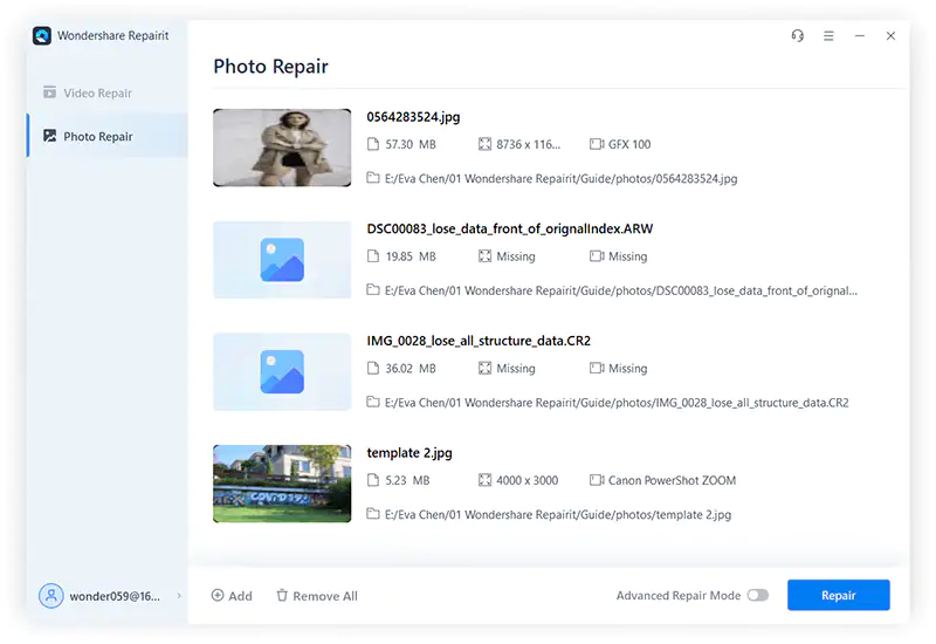
Step 2: Select Photo Repair from the top left corner and click the Add button to upload the JPG photo(s) that you want to repair.
Step 3: Once the photos have been uploaded, click the Repair button at the bottom right corner to start the repair process.
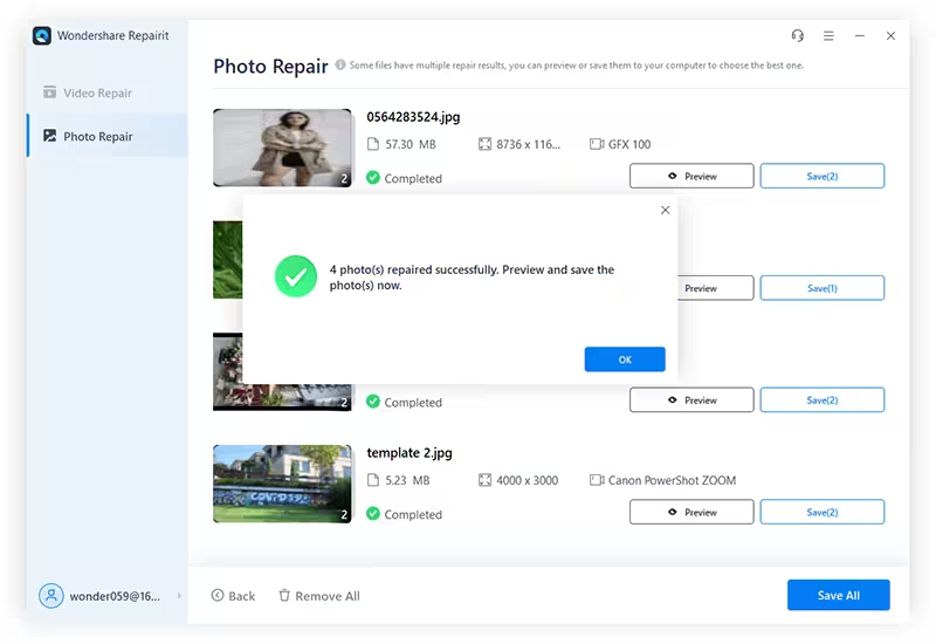
 Step 4: The software should fix the JPG photo within a few minutes. After that, preview the photo to confirm its quality. Then, save it to your PC storage.
 If you’re not satisfied with the quality, use the Advanced Repair mode by following the procedures below;
- Click Advanced Repair and upload a Sample photo. A sample photo is the better version of the photo you intend to repair created with the same device in the same format.
- Next, click the Repair button to begin the advanced repair process. This usually takes only a minute or two.
Step 5: Finally, preview and save the photo to your PC’s local storage.
Method 4. Run an SFC scan
Another effective method to fix JPG file not opening problem is by running an SFC scan on your PC. This will help to fix broken operating system components that are preventing the JPG files from opening.
Step 1: Press the Windows button on your keyboard and type CMD in the search box.
Step 2: Right-click the search result and click Run as administrator.
Step 2: Type the following command and press Enter;
sfc/scannow.
Step 4: After you complete the above, restart your PC and try opening the JPG file. If the file is still not fixed, proceed to the next step.34wq
Method 5. Perform Clean Boot
Your JPG file won’t open if your PC is running very slowly or packed with errors that prevent certain programs from working. For this reason, we recommend you perform a clean boot filter the problems that might be preventing the JPG files from opening.
Step 1: Click the Windows button on your keyboard. Then, type Msconfig in the search bar and select System Configuration.
Step 2: Navigate to the Services tab and select Hide All Microsoft Services. Then, click Disable All.
Step 3: Up next go to the Start Tab and select Open Task Manager. Then, disable all the apps under the Start Up tab one after the other.
Step 4: Now, navigate back to the Startup tab in System Configuration and choose OK to finish.
After you complete the above steps, restart your PC and the Windows will be launched in a clean boot environment.
Method 6. Perform CHKDSK command
If you still can’t open JPG file on your PC, you need to perform the Windows CHKDSK command to repair any system error preventing the file from opening. See the steps to help you operate seamlessly below;
Step 1: Press the Windows Start button on your computer and type CMD in the search bar. Then, select Command Prompt and click Run as Administrator.
Step 2: Once the command prompt pops up, type the command “chkdsk and click the enter key.
Step 3: Once you complete the above, CHKDSK will instantly scan for errors on your PC and let you know if it has detected any you should repair.
If you don’t know how to open JPG files with errors, the article above got you covered with the best techniques to get the job done without compromising the quality of your photos.
It does not matter whether you’re looking to use advanced software or not, we’ve provided the best methods you can always count on to fix the JPG file not opening errors effortlessly.

