Exploring CapCut’s Green Screen Editing for Creative Backgrounds
Video backgrounds are often overlooked by creatives and some editors based on the assumption that they are not the main focus of the video. Sometimes, you may also be tempted to make do with a poor-quality background because the process of trying to switch up is simply too difficult to contend with.
However, despite them not being the main focus in most videos, backgrounds have a major impact on the general look of your content and your audience’s viewing experience. They can transform even the simplest of videos from basic to sensational.
Not sure how to change that boring or unsuitable background on your video? Well, then you certainly deserve an introduction to green screen editing on the CapCut free online video editor.
Do come along as we explore how it works, why it is so outstanding, and some tips and tricks about using it.
Green Screen Editing 101
A green screen is a plain background used in video recording as a placeholder during filming so that you can add a more suitable background when editing the video content later on.
For example, if you are shooting a vlog outdoors, you can place an actual screen behind you or shoot in front of a plain wall then add a more appealing background using a tool like CapCut.
How Does It Work on CapCut?
Most editing solutions or tools tend to only use an approach known as ‘Chroma Keying’. CapCut, on the other hand, offers an additional alternative that allows you to use whichever creative backgrounds you need in just a few simple steps.
Aim for Contrast
Your background will only stand out if it contrasts with the video content on the background. So, keep this in mind and make the right background choices as you begin your green screen editing.
Select and Import the Background Video
Access your CapCut video editor and click on the ‘+’ to start a new project. This will redirect you to your gallery where you can select the video that you would like to have as your background.
Choose an appropriate video that offers adequate contrast.
Edit the Background
Once the video is uploaded in the CapCut editor, take a moment to edit it. For example, you can trim it to only leave the content that you would like to appear in the background. You can also alter the speed, perhaps make it slower, so that it is not so dramatic that it overshadows the content in the foreground.
Additionally, consider using the Capcut resize tool to harmonize the background’s aspect ratio with that of your video footage. This means that if you shot your content in a 16:9 ratio then you could resize your background to that size so that it is a good fit for your content.
Overlay
When the background is ready, return to the main editor menu.
- Click on the ‘Overlay’ option
- Select ‘Add Overlay’
- The editor will redirect you to the gallery to choose the video you were preparing a background for I.e your actual video content.
- Click ‘Add’
The CapCut editor will automatically add or overlay your video onto your selected background.
Remove the Background
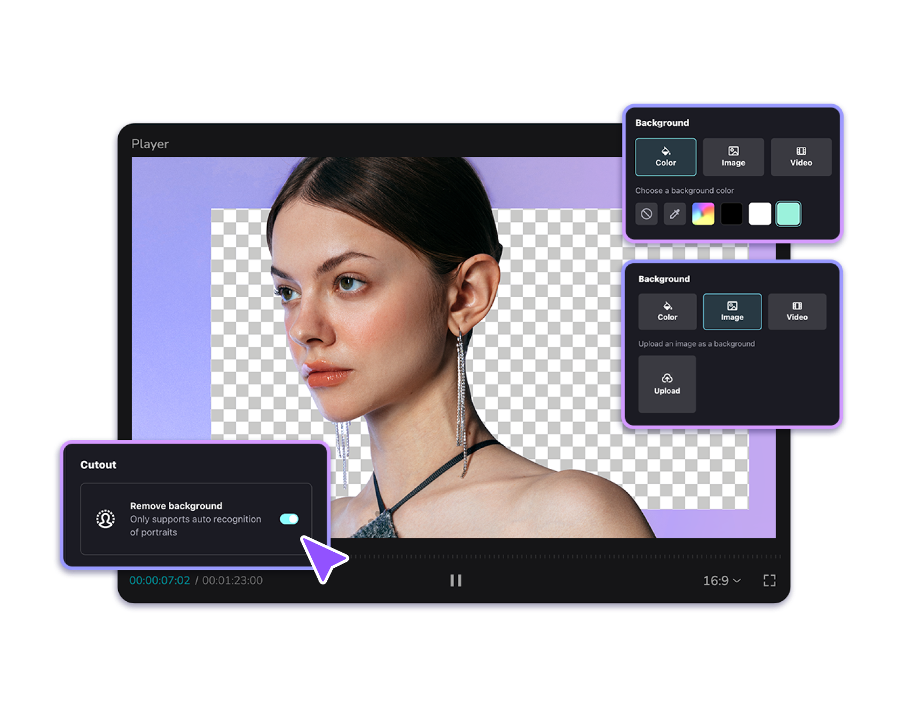
At this point, you need to remove the background on your main video so that the background you prepared can be visible. So:
- Click on the ‘Edit’ option
- Select the ‘Cutout’ option
- Select ‘Remove Background’
The CapCut video will then remove the background in your video (i.e. the green screen) and implement the background you prepared as its new and only background.
Tips and Tricks to Ace Your Green Screen Editing on CapCut
Now that you know how to navigate the green screen editing process, let’s talk about some of the things you can do to perfectly sync your background.
Prepare Your Background Adequately
Your background needs to remain in place for the entire duration of your video. So, if you use a video as your background, ensure that it will match the length of your video.
As we mentioned earlier, aim for a background with an aspect ratio that can accommodate your actual video. Consider that if the background is too small, you may have to shrink the main video to an even smaller size which may defeat the whole point.
Manage the Background Video’s Audio
If the background video has any sound, it will likely clash with the sound of your main video. It is thus advisable to use the CapCut audio extraction tool to erase its audio before you overlay your main video. You can find the audio extraction tool among the options under the ‘Edit’ menu.
Why CapCut?
There are many other editors that you could use for green screen editing. So, why CapCut?
A Complete Array of Tools
The CapCut online video editor offers a full range of editing tools to make your backgrounds as dynamic as you need them to be. Between the video background remover, and other options like speed adjustment, resizing, and color grading, you can rest assured that you will have everything you need to get your green screen editing right.
User-friendliness
The CapCut green screen editing process does not require any complex editing skills. Instead, the tool is pre-programmed to do all the technical work. You only have to follow a few yet direct steps.
Background Variety
CapCut gives you absolute creative discretion when it comes to choosing backgrounds. You can select videos on your device or even opt for the stock videos that it provides.
The Parting Shot
Using a video as your background can seem rather unusual if you have not tried it before. Nevertheless, once you make your first edit, you will realize that it offers an endless variety of options. So, dear reader, do say goodbye to uninspiring backgrounds and allow CapCut green screen editing to up your content game to the next level.

